English User Guide
- How to register into the InfoPi System
- How to login into the InfoPi system
- How to recover your password
- How to compose a message
- How to schedule a message
- How to access the Contacts List
- How to create a group of contacts
- How to add a contact to the Contacts List
- How to add multiple contacts to the Contacts List
- How to send a message from an external file
- How to access message templates
- How to create a message template
- How to compose a message using a template
- How to Access the Profile Management Page
- How to Update your Password
- How to update the user profile
- How to view the status of sent messages
- How to view Incoming Messages
- How to purchase SMS credits via Mpesa
- How to Access Sent Messages
- How to Delete Messages
- How to add multiple contacts to a group
- How to delete Contacts
- How to edit a contact
- How to Access Application Settings
- How to Change the Message Footer
- How to Access WebServices Settings
- How to Change the Language Settings
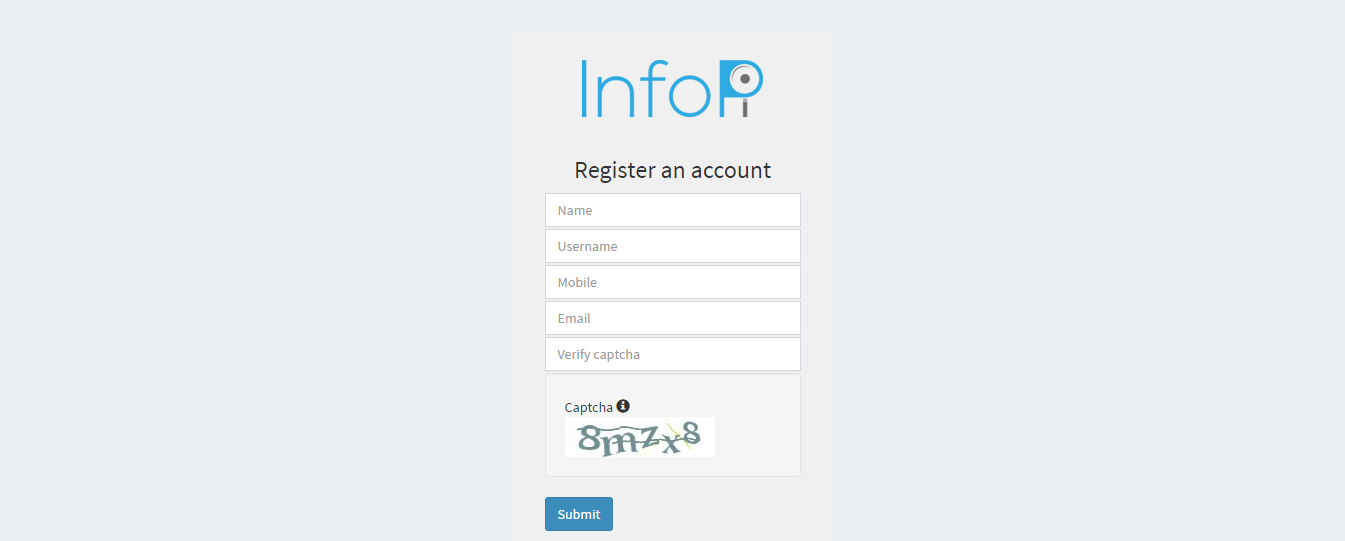
How to register into the InfoPi System
To register:
Access the platform via infopi.io, text.co.ke or textkenya.com.
Click on the get started button.

Click on register an account.

Input the required details: your name, username, mobile number, email and the displayed captcha then click on submit.
You will receive a welcome SMS that has the first login credentials from Medulla. Sample SMS:

Alternatively, check your email to obtain the first login credentials. Sample email:

You will be awarded 5 SMS credits for test purposes.
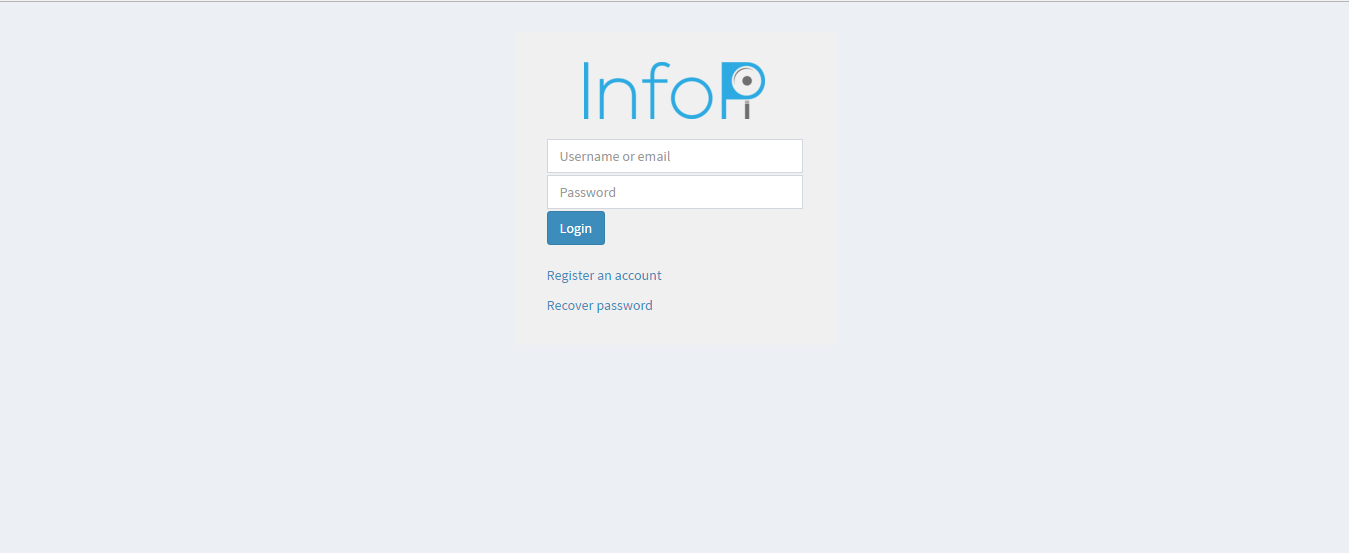
How to login into the InfoPi system
Access the platform via http://infopi.io/.
If you are not registered in the platform, please register.
Click on login.

Input your username and password and click login.
How to recover your password
To recover your password:
Access the platform via infopi.io.
If you are not registered in the platform, please register.
Click on login.
Click on recover password.

Input the required details: username, email and the displayed captcha then click submit.

Check your email to obtain a temporary password. Sample email:

Proceed to login.
How to compose a message
Login into the platform.

Compose Message
Write the desired message on the message text box.
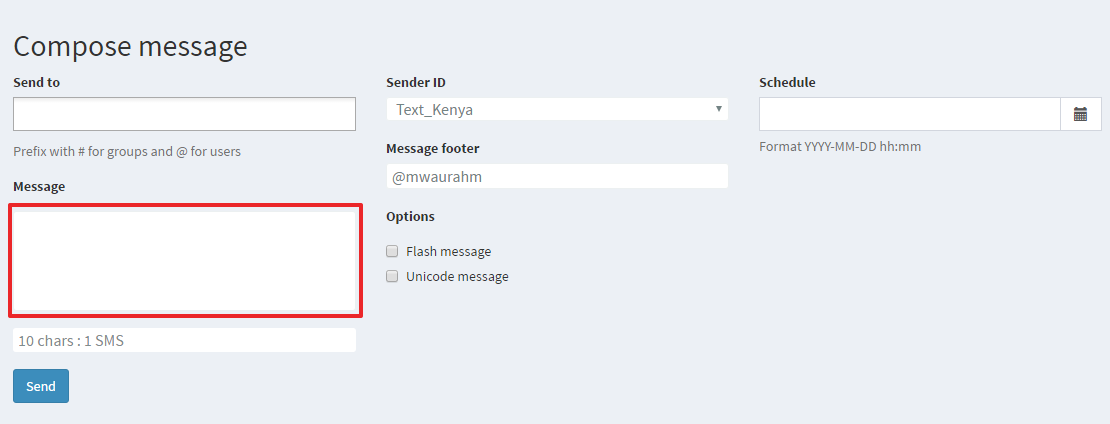
Note: The character limit per SMS is 160 characters but a message can be a concatenation of numerous SMSs.
If the message has special characters such as ¶®|ĄÐ¾, the character limit per SMS is 70 characters. The message is referred to as a unicode message.
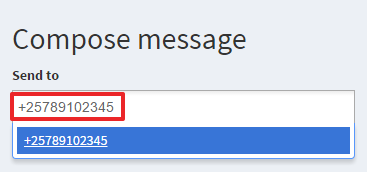
Recipients
The recipient can be:
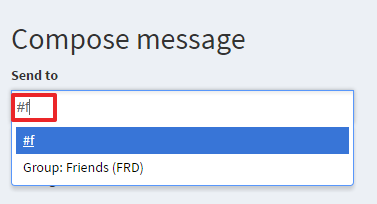
A group - To send the message to the group, type the character # followed by any character in the group name and select the desired group.
Subusers - To send the message to the subusers in your account, type the character @ followed by any character in the username of the subuser then select the desired subuser.
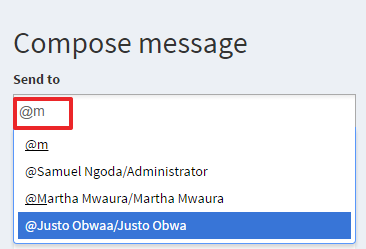
A contact in the phonebook - To send the message to a contact in the phonebook, type a few characters of the contact's name then select the desired contact.
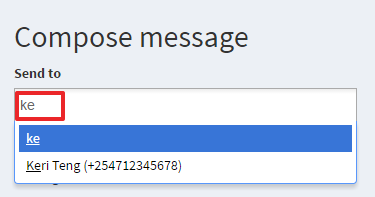
A contact not saved in the phonebook - To send the message to a contact that has not been saved in the phonebook, type the phone number of the desired recipient.
Sender ID
The sender ID is set up by the administrator.
Message Footer
By default, the message footer is the username. However this can be changed to any value or be left blank. The footer is usually appended at the end of the message.
Send
You can schedule the message or click the button send to send the message immediately.
How to schedule a message
Compose the desired message.
Click on the calendar icon  and
and set the date and time you wish to have the message sent.
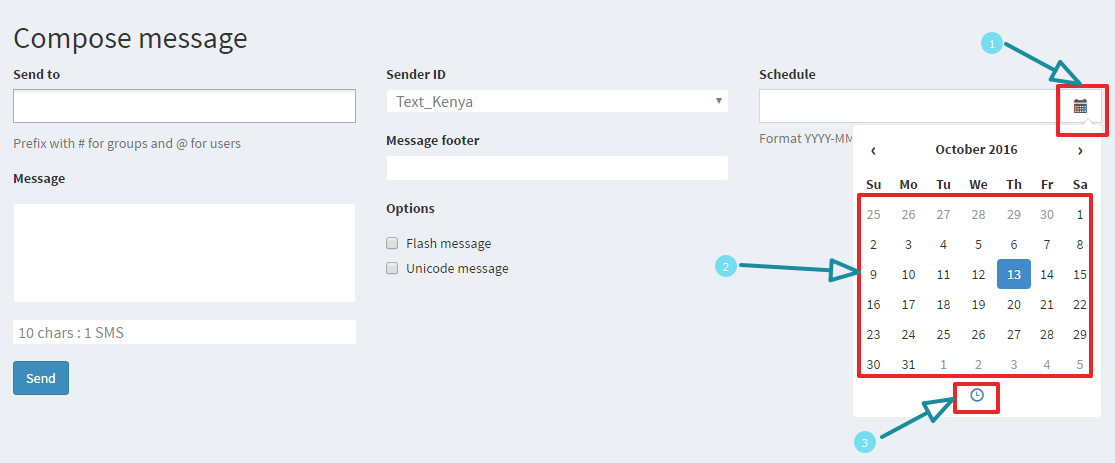
Click send.
Note: The message will remain in the queue until the scheduled time.
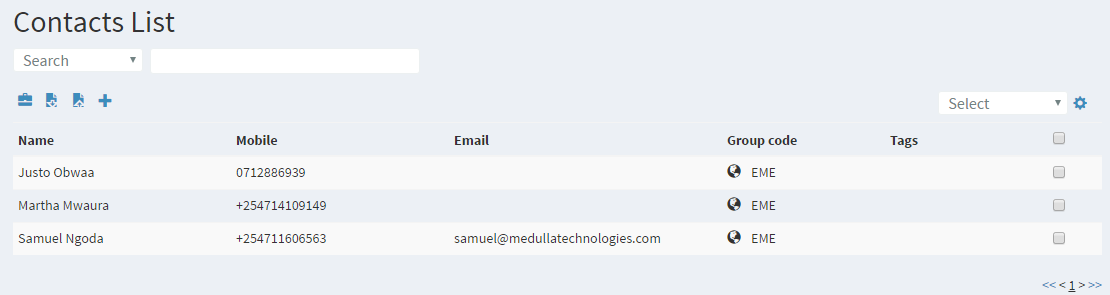
How to access the Contacts List
Login into the platform.

The contacts of InfoPi's support team appear on the Contacts List by default.
How to create a group of contacts
Access the Contacts List.
Click on the  icon to land on a similar page as shown below.

Click on the  icon.
icon.
Input the required details: a suitable group name and group code. Set the broadcasting permissions the. There are 3 broadcasting permissions' setting options:
- Me only - Only the creator of the group has access to the contacts in the group and can send a broadcast message to the group members.
- Members - The creator of the group and his / her subusers can send a broadcast message to the group members.
- Anyone - The group is public.

Click on save.
How to add a contact to the Contacts List
Access the Contacts List.
Click on the add ![]() button.
button.
If you wish to save the contact in a particular group, select the desired group in the group selection panel. If you haven't created any group and you wish to group your contacts, create a group.
Input the required details: name, mobile number, email and tags.
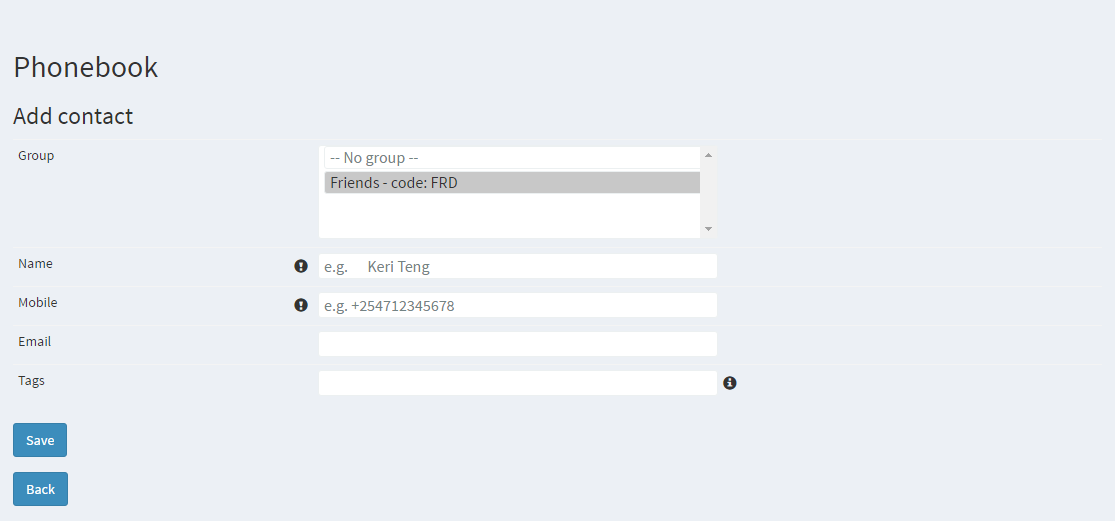
Note: Name and mobile number are mandatory fields.
Click on save.
How to add multiple contacts to the Contacts List
Access the Contacts List.
Click on the import ![]() button.
button.
Prepare an excel file with the contacts arranged in the order: name, mobile number, email, group code and tags as in the example below.

Note: Name and mobile number are mandatory.
Save the excel file in the csv format, for example, contacts.csv.
Choose the saved file and click import.
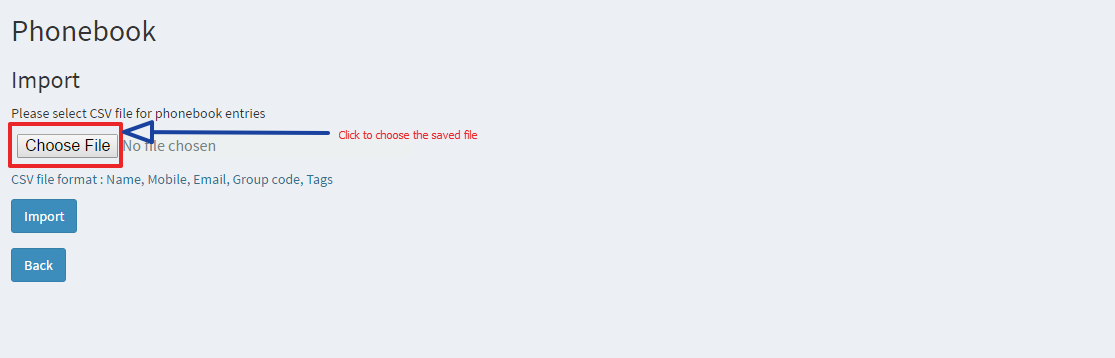
Click import to confirm the importation.

How to send a message from an external file
Login into the platform.
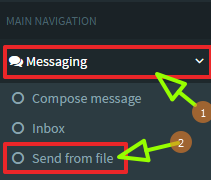
Prepare an excel file of the messages to be sent in the order: contact, message as in the example below:
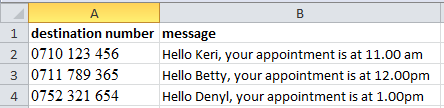
Save the file in csv format, for example, message.csv.
Select the saved file.

To avoid sending duplicate messages to the same person, tick the prevent duplicates option then click upload file.
Click send SMS to valid entries for confirmation.

How to access message templates
Login into the platform.

How to create a message template
Access the message template page.
Click on the icon.
Input the template name and compose the template content.
Note:
- #NAME# will be replaced with the recipient's name listed in phonebook
- #NUM# will be replaced with the recipient's phone number listed in phonebook
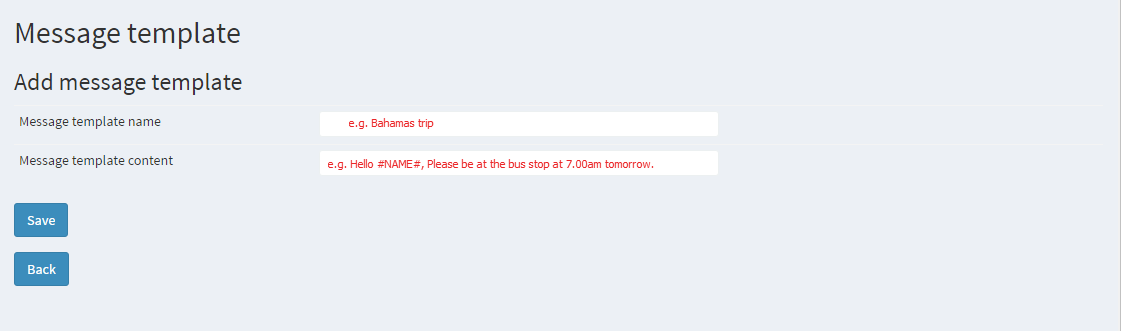
Click on save.
How to compose a message using a template
Create the message template.
Compose your message, however, rather than typing your message directly in the text box, select the template you created.
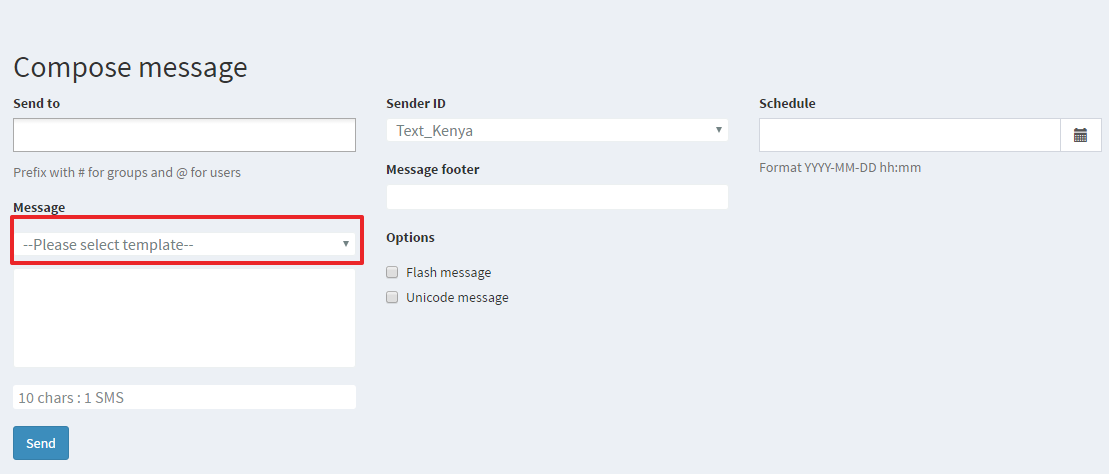
Click send once you have filled all required fields.
How to Access the Profile Management Page
Login into the platform.
How to Update your Password
Access the profile management page.
Type your preferred password on the space provided and retype it in the field that follows.
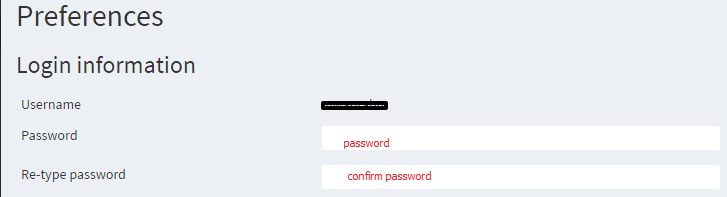
Scroll down and click save to save the changes.
How to update the user profile
Access your profile.
Input or change the details you wish to update such as name, emailand phone number, or contact details like address, city, state or province, country and zipcode.
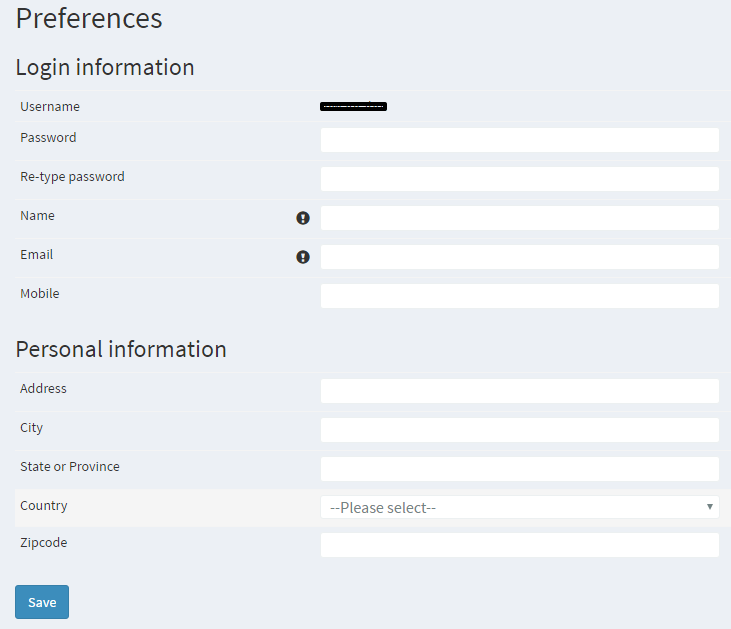
Note: The profile must have a name and an email.
Click save to effect the changes.
How to view the status of sent messages
Login into the platform.
How to view Incoming Messages
One can receive messages through a shortcode such as "23456" or via USSD such as " *789# ".
After the shortcode or USSD has been configured, one receives their incoming messages through their InfoPi accounts.
To view the incoming messages, login into your account.

The incoming messages are listed as below:

Click the icon ![]() to reply to the message and the icon
to reply to the message and the icon ![]() to forward the message.
to forward the message.
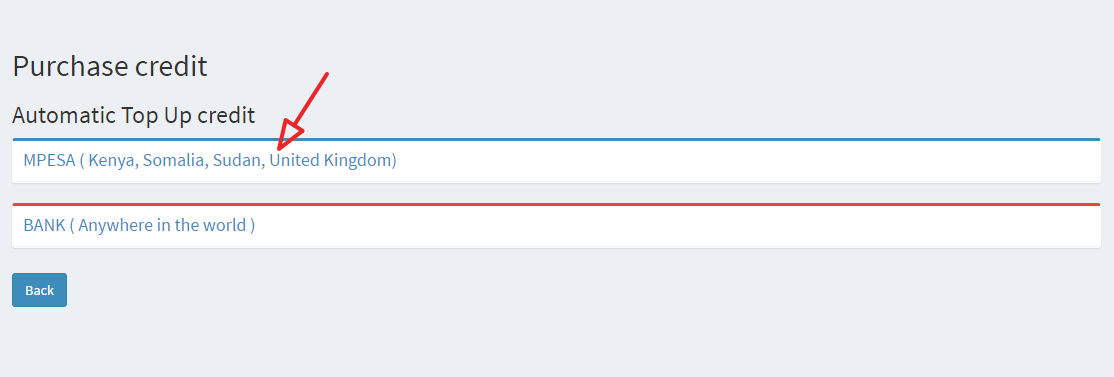
How to purchase SMS credits via Mpesa
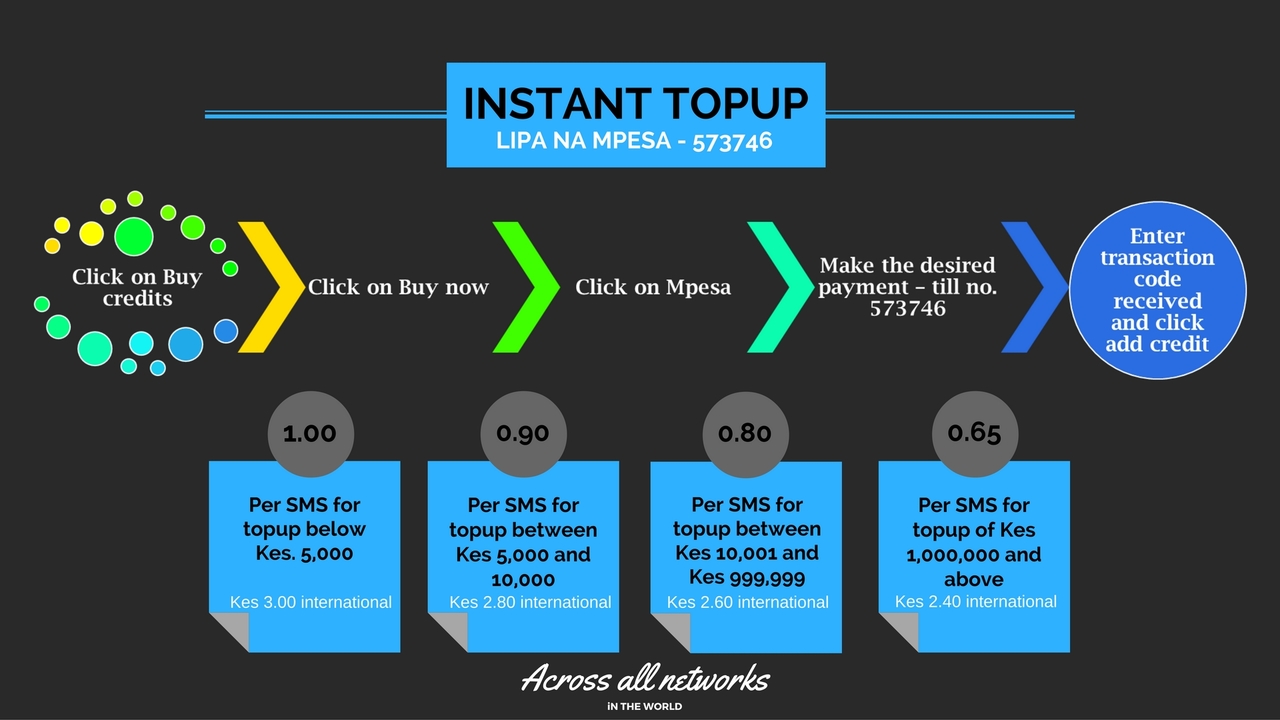
To purchase credits via Mpesa:
- Login into your account.
- On the main menu, click on
buy creditsthenbuy now.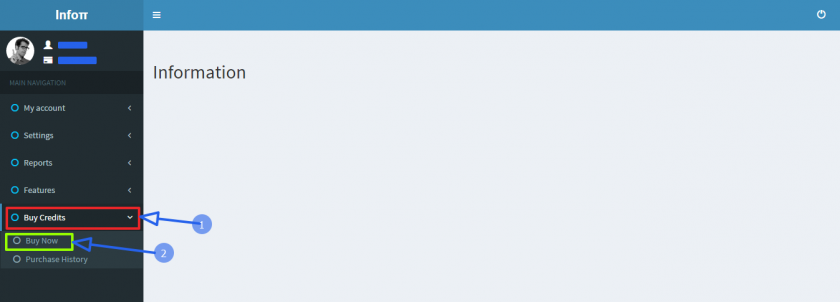

- Click on the
Mpesa payment option.
- On your phone:
- Go to your mpesa menu
- Click on Lipa na M-PESA
- Click on Buy Goods and Services
- Enter the till number:
573746 - Enter the desired amount
- Input your PIN and confirm the transaction
- Input the
transaction codeas illustrated below and click onadd credit.

- A
summary of all transactionswill be displayed.

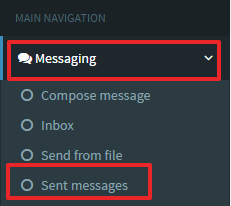
How to Access Sent Messages
Login into the platform.
The sent messages appear as below:

Delivery Status:
![]() The message has been sent and delivered.
The message has been sent and delivered.
![]() The message has been sent and acknowledged by the destination network but not delivered.
The message has been sent and acknowledged by the destination network but not delivered.
![]() The message has been sent but has not yet been acknowledged by the destination network.
The message has been sent but has not yet been acknowledged by the destination network.
![]() The message has failed either due to:
The message has failed either due to:
- An incorrect format of the recipient's number
- The recipient's number is restricted or blacklisted
- The length of message exceeds the permissible characters
- The message has been pending for more than 24 hours (The duration varies depending on the network)
How to Delete Messages
Access the message(s) you wish to delete, be it inbox messages or sent messages.
Tick the check box against the message you wish to delete.
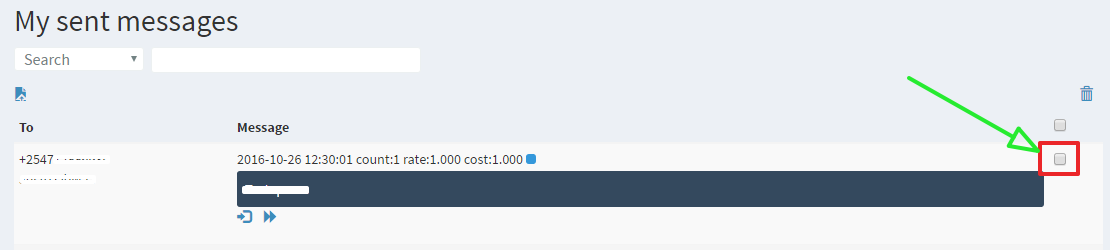
Click  to delete the message.
How to add multiple contacts to a group
Add all contacts to the contact list either singularly or in multiples.
Ensure the group has already been created.
Select the contacts to be added to the group as illustrated below:
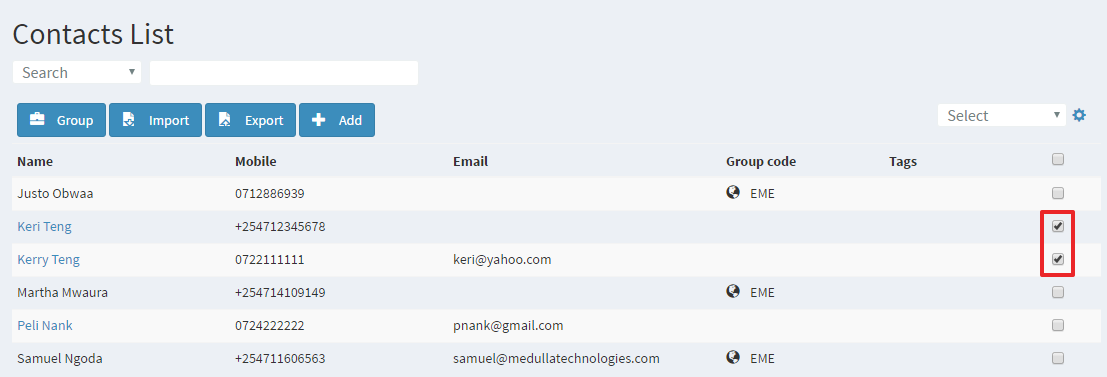
Click the select drop down menu to select the group at the top right corner.

Click the  icon to effect the change.
How to delete Contacts
Access the contacts list.
Select the contacts to be deleted as illustrated below:
Click the select drop down menu to select the delete option at the top right corner.
Click the icon to effect the change.
How to edit a contact
Access the contacts list.
Click on the name of the contact you wish to edit.
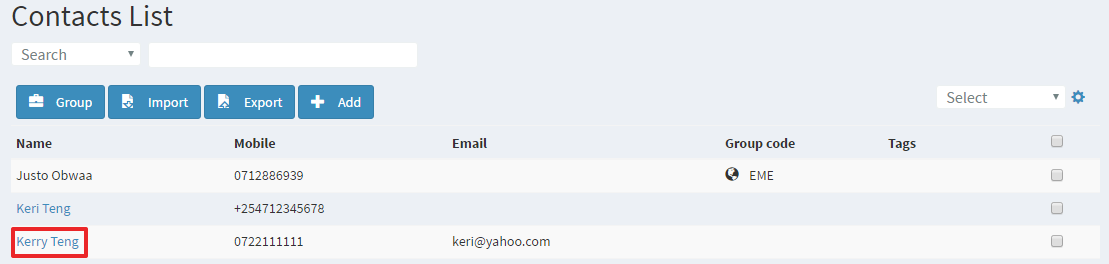
Update the details.

Click save to effect the changes.
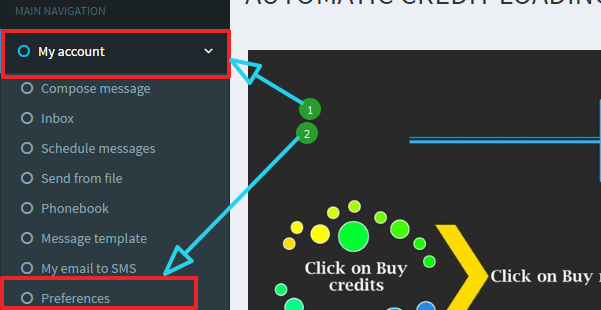
How to Access Application Settings
Login into the platform.

How to Change the Message Footer
Access the application settings.
The default message footer is the username of your account therefore to change it, clear it and replace it with your desired footer.

How to Access WebServices Settings
Access application settings.
The webservices settings are as illustrated below:

You can adjust the settings to suit the needs of your application.
How to Change the Language Settings
Access the application settings.